View Recognition for the DAT
/Learn key top-front-end strategies, plus practice questions and answers

Learn key top-front-end strategies, plus practice questions and answers
----
Part 1: Introduction to view recognition
At first glance, a view recognition question is confusing. You are given two of three views (top, front, end) of an object and tasked with determining how the missing point of view would appear. Each point of view is shown in 2D using solid and dashed lines. You may be tempted to just guess, especially if you don’t understand how to interpret the different lines.
This guide will teach you how to make sense of top-front-end questions and provide you with proven strategies to deduce the correct answer. After you have the basics down, apply these strategies to the practice questions and answers at the end.
----
Part 2: Basics and strategies
Just like the other PAT sections, there will be 15 top-front-end questions on the DAT. You’ll have 60 minutes to complete 6 PAT sections, so about 10 minutes for these 15 questions.
Here is an example of the type of questions you’ll see for the view discrimination section:

FIGURE 1: VIEW RECOGNITION QUESTION, CHOICE B IS CORRECT
For each question, the correct answer choice is the one that matches the view with a question mark above it. This question specifically asks for the front view. Solid lines are sides that can be seen from that point of view. Dashed lines cannot be seen from the given point of view but are usually visible from other points of view.
Let’s look at a simple example. If you have one nearby, grab a can. This can is represented simply by the following cylinder:

FIGURE 2: CAN OF SOUP
The bottom of the can has a dashed line to represent the back curve of the can that is not visible when looking down at it from an angle.
Set the can on your desk and look at it from the top, front, and end. These points of view are depicted with arrows in the figure below. The front view is shown by an arrow going into the page.

FIGURE 3: TOP, FRONT, AND END VIEWS OF CAN
Notice that the end view is what the can looks like from the right side. The end view will always represent the right face of the object. The different points of view are represented below:

FIGURE 4: TOP, FRONT, AND END VIEWS OF SOUP CAN
Looking straight down on the can from above, it appears to just be a circle. The front and end views, however, are both rectangles. All three of these views can be combined to create the cylindrical can.
Let’s look at another example to see how dashed lines appear in this section. The top view of an object is shown below.

FIGURE 5: TOP VIEW OF A RECTANGULAR OBJECT
From this point of view, you cannot tell if the small rectangle or circle features are protruding from the base or are cutouts of a larger structure. The front view of the object clarifies what is protruding and what is a cutout.

FIGURE 6: TOP AND FRONT VIEW OF OBJECT
From this point of view, the rectangular structure on the left is shown with solid lines extending above the base structure. This means that the rectangle is protruding from the base on a second level. The dashed lines on the right mean that the circular structure does not protrude from the larger base. Rather, the circular structure is a cylindrical cutout in the base.

FIGURE 7: TOP, FRONT, AND END VIEWS OF RECTANGULAR OBJECT
Finally, the end view offers further clarity on the structure of the object. The protruding feature that originally appeared to be a rectangle is in fact slanted. From this point of view, it is triangular. This is an important concept to remember related to top-front-end questions. Just because something appears to be a flat rectangle does not always mean that is the case. For example, you may have no indication that a surface is sloped in the two images you are given, but the only answer choice that makes sense has a sloped surface. Be sure to consider whether or not a feature could be sloped.

FIGURE 8: 3-D VIEW OF SAME OBJECT
To further your understanding of the top-front-end section, let’s look at how each point of view is related. For the previous example, note that the vertical lines and edges of the circle on the top view correspond to vertical lines on the front view.

FIGURE 9: VERTICAL LINES OF FRONT VIEW CORRESPOND WITH VERTICAL LINES OF TOP VIEW
Horizontal lines on the front view go with horizontal lines on the end view.

FIGURE 10: HORIZONTAL LINES AND FEATURES OF FRONT VIEW CORRESPOND WITH HORIZONTAL LINES AND FEATURES OF END VIEW
Horizontal lines on the top view line up with vertical lines of the end view when reflected across a 45 degree angle as pictured below.
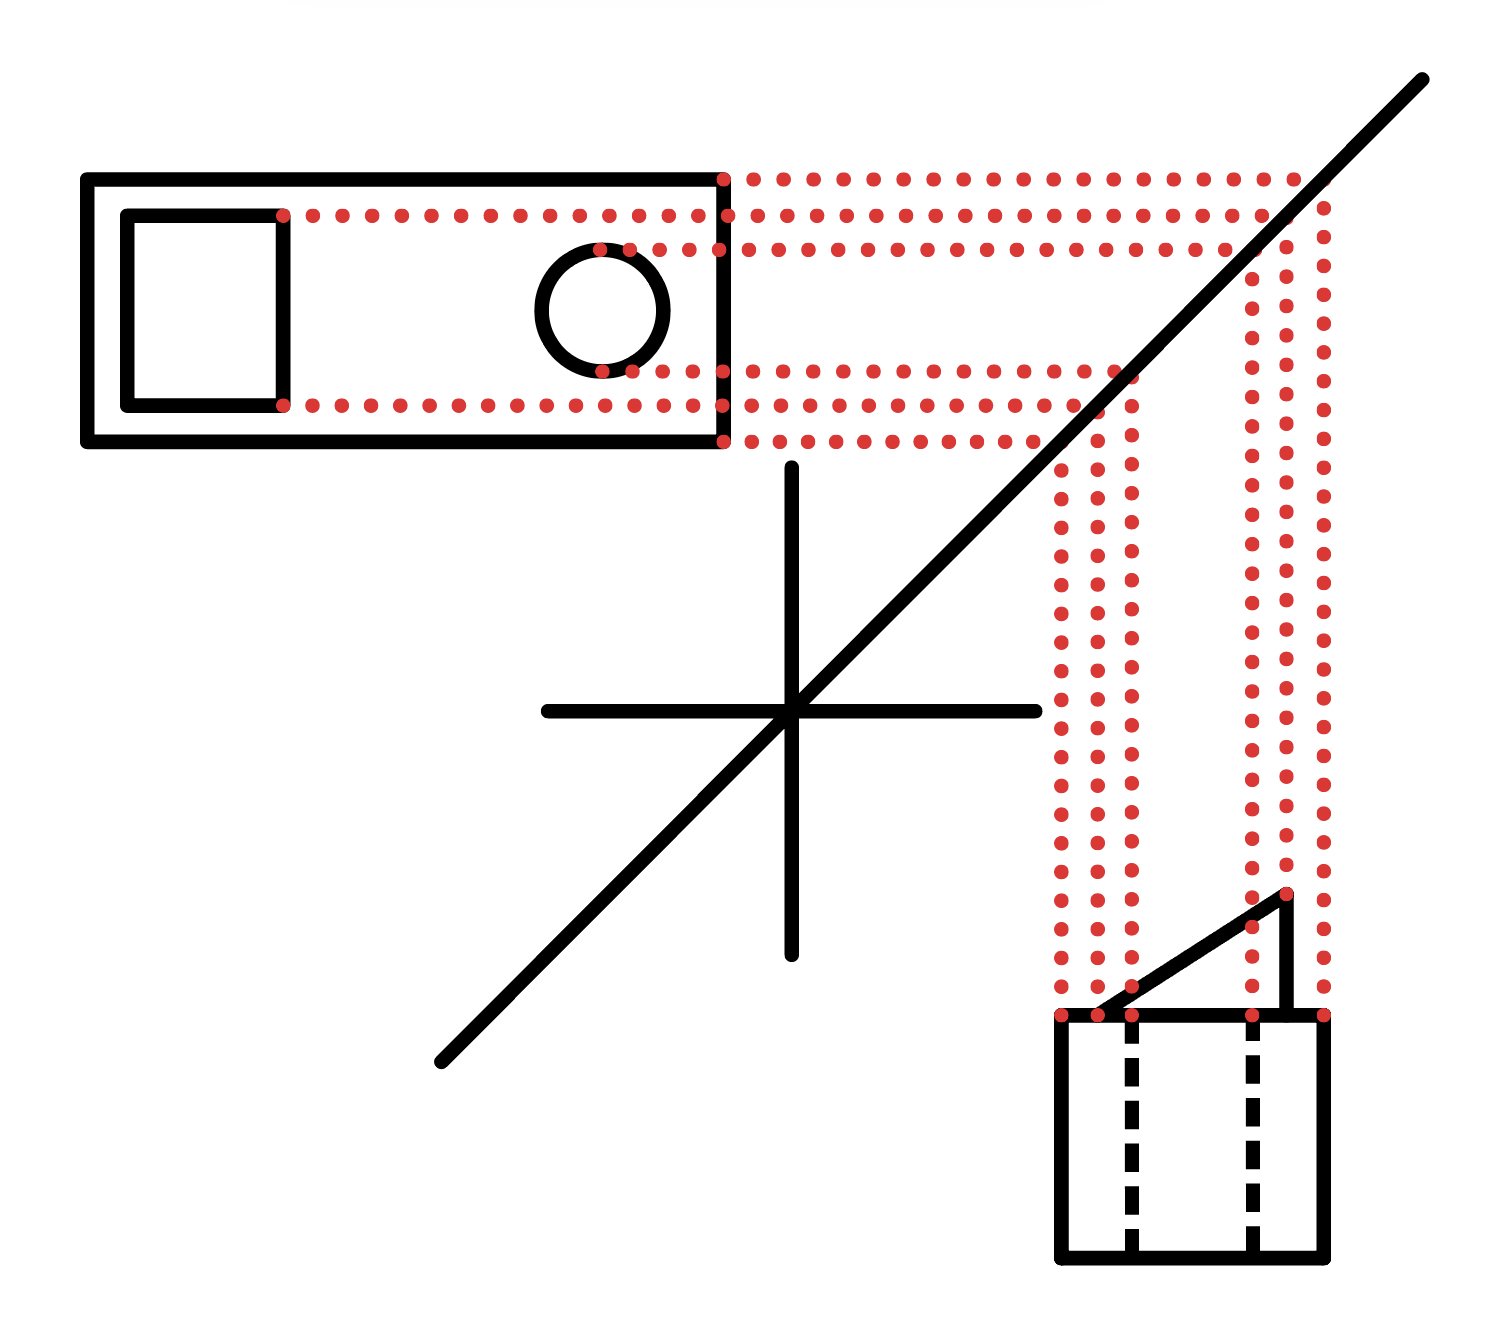
FIGURE 11: VERTICAL LINES OF END VIEW LINE UP WITH HORIZONTAL LINES OF TOP VIEW
Understanding how each of these views is related can help you make sense of the views you are given and deduce which answer choice is correct.
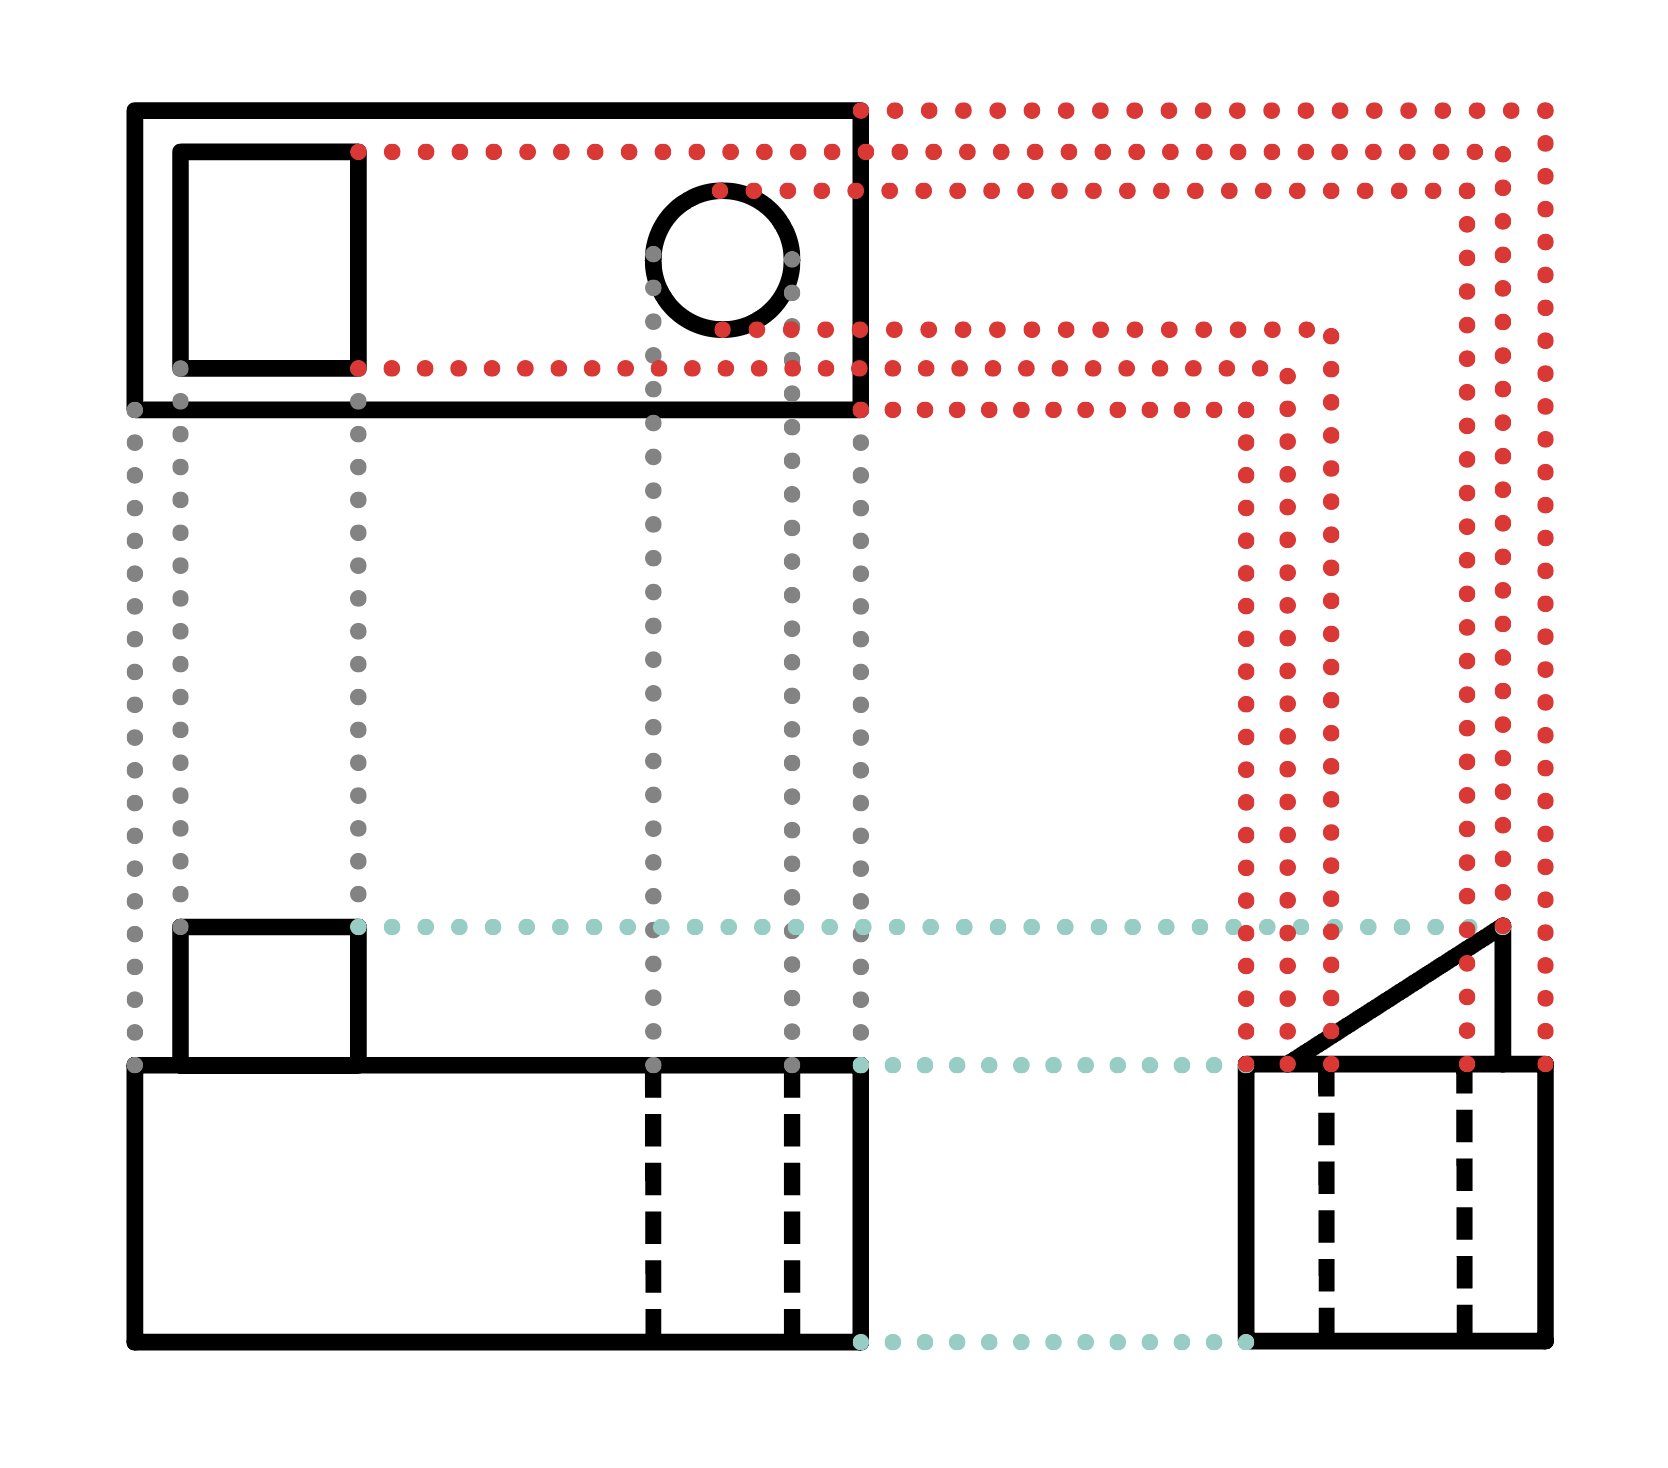
FIGURE 12: RELATIONSHIP BETWEEN ALL LINES AND FEATURES
Now, let’s learn some strategies that will help you answer these questions. The first strategy is to picture each object in your mind based on the views you are given and to mentally rotate them. For example, if you are given the front and end views, try to rotate each view in your mind and picture what the top view would look like. This will take some time to learn how to do effectively. That being said, visualizing what the missing view should look like before you look at the answer choices will make a big difference.
The next strategy is one that you are already familiar with. Process of elimination will help you on all sections of the DAT, but is especially useful when answering top-front-end questions. Let’s look at the following practice problem.
